Landmine press alternatives: the same angled press without the landmine

The best landmine press alternative is the single-arm dumbbell shoulder press, because it keeps the one-arm press and lets your elbow travel slightly forward the way the landmine's arc does. For the same in-between angle with both arms, use an incline dumbbell press on a steep bench; for a cranky shoulder, a kettlebell bottoms-up press; at home with no weights, a decline push-up or pike push-up. No landmine attachment at all? Wedge the end of a barbell into a corner and you can still do the original.

What a landmine press alternative has to replace

The landmine press trains your front delts, upper chest and triceps, with your serratus pulling your shoulder blade forward as you reach. Because the bar pivots from the floor, you press up and forward on an arc instead of straight overhead, so your arm never has to get all the way beside your ear. That is why people with stiff or touchy shoulders like it.

A good replacement keeps three things: a press angled between a bench press and an overhead press, an elbow that stays a little in front of your body, and ideally one arm at a time so your trunk has to resist the twist.

How to do the landmine press

Dumbbells: the closest swaps

Dumbbells let your elbows sit wherever your shoulders are happy, which is most of what the landmine gives you. Press one arm at a time when you want the trunk work too.

Closest one-arm swap

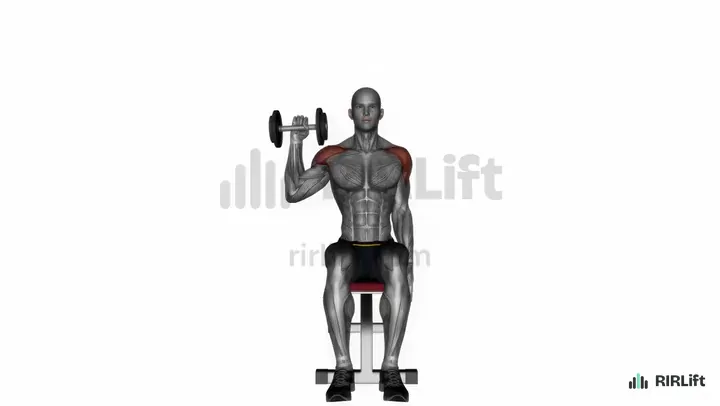
Single-Arm Dumbbell Shoulder Press

Shoulders

One dumbbell, one arm: the same one-sided press as the landmine, so each shoulder does its own work. Let your elbow sit slightly in front of your body to keep the landmine's angle; for more trunk work, do it half-kneeling instead of seated.

How to do it

  1. Sit on an upright bench with your back on the pad and one dumbbell at shoulder height.
  2. Rest your free hand on your thigh and plant your feet.
  3. Press the dumbbell straight up to a locked elbow.
  4. Lower it to the shoulder, finish the set, then switch arms.

Cues

  • Stay level
  • Back on the pad
  • Even reps both sides

Common mistakes

  • Leaning toward the free side to get the weight up: if your torso tilts, the dumbbell is too heavy.
  • Arching off the backrest: keep your ribs down and your back on the pad.
  • Doing more reps on the strong side: match the weaker arm's count.

Shoulder-friendly two-arm swap

Neutral-Grip Dumbbell Shoulder Press

Shoulders

Palms facing each other lets your elbows stay forward instead of flaring out, which is the position that makes the landmine comfortable. Pick it over the single-arm version when you want both arms done in one set.

How to do it

  1. Sit against an upright bench with a dumbbell at each shoulder, palms turned in.
  2. Keep your elbows pointing slightly forward rather than straight out to the side.
  3. Press up to straight elbows.
  4. Lower under control to the starting point beside your shoulders.

Cues

  • Palms in
  • Elbows forward
  • Stack wrists over elbows

Common mistakes

  • Letting the dumbbells drift wide at the top: keep them right above your shoulders.
  • Rushing the bottom: the hardest part of the rep is the first few inches out of it.

Same angle, both arms

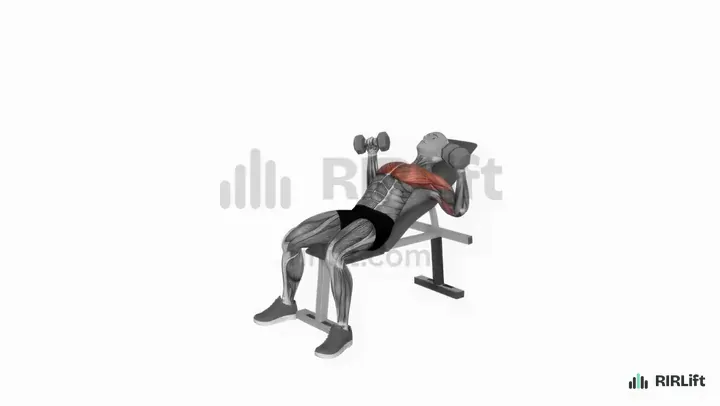
Incline Dumbbell Press

Chest

A bench set steep puts your press between a bench press and an overhead press, which is the landmine's angle. Expect more upper chest than the landmine and a heavier pair of dumbbells.

How to do it

  1. Set the bench to about 45 degrees and sit with a dumbbell resting on each thigh.
  2. Lie back and bring the dumbbells to the front of your shoulders, palms facing forward.
  3. Plant your feet, keep your hips on the seat and your upper back on the pad.
  4. Press both dumbbells up until your arms are straight above your shoulders.
  5. Lower them under control until they are just outside your upper chest, then press again.

Cues

  • Steep bench, front delts working
  • Wrists over elbows
  • Hips stay down

Common mistakes

  • Bridging your hips off the seat to finish a rep: that flattens the angle, so lighten the dumbbells and keep your glutes on the bench.
  • Stopping halfway down: lower until the dumbbells reach the sides of your upper chest every rep.

RIRLift's swap with dumbbells

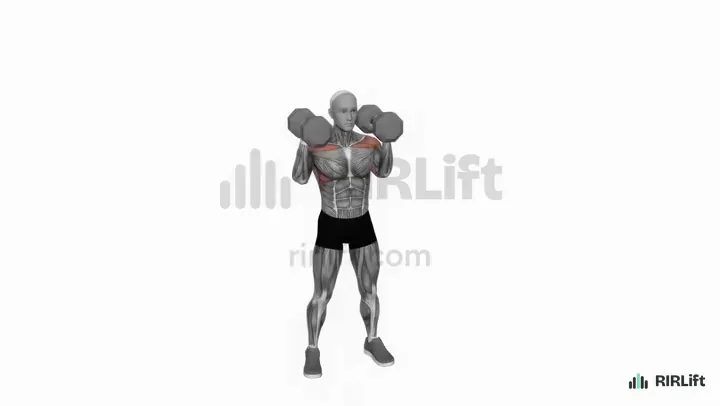
Alternating Dumbbell Shoulder Press

Shoulders

Standing and pressing one side at a time while the other dumbbell waits at your shoulder keeps the trunk challenge of a one-arm landmine press. This is what RIRLift puts in the landmine press's place when you have dumbbells.

How to do it

  1. Stand holding a dumbbell at each shoulder, palms turned in.
  2. Press one dumbbell up to a straight elbow while the other stays put.
  3. Lower it back to the shoulder.
  4. Press the other side and keep switching until both arms have done their reps.

Cues

  • One up, one parked
  • Brace before each press
  • Stay tall

Common mistakes

  • Leaning toward the side that is pressing: the parked dumbbell should help keep you level.
  • Letting the waiting arm drop: hold it at the shoulder the whole set.

Kettlebells

A kettlebell sits behind your wrist, so your elbow stays tucked and in front at the start, much like holding the end of a landmine bar.

Best for a cranky shoulder

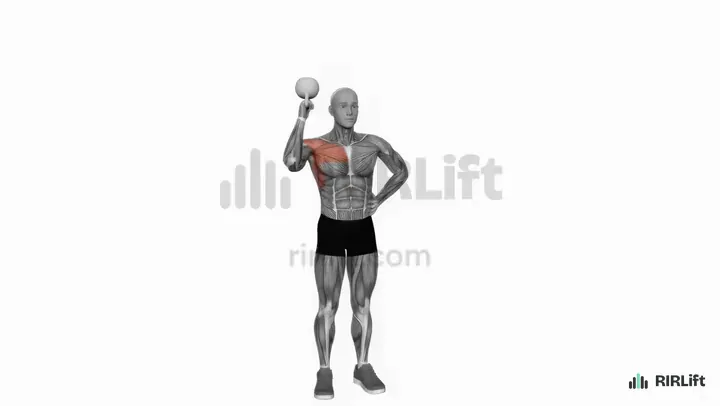
Kettlebell Bottoms-Up Press

Shoulders

Holding the bell upside down means it only stays up if your wrist, elbow and shoulder stack, so the press grooves itself. The load is light, which is the point: use it when heavier pressing pinches.

How to do it

  1. Hold a light kettlebell upside down by the handle at your shoulder, bell pointing up.
  2. Squeeze the handle hard and brace your trunk.
  3. Press the bell straight overhead, keeping it balanced above your fist.
  4. Bring it back to your shoulder slowly and repeat. Switch hands after the set.

Cues

  • Crush the handle
  • Wrist stacked under the bell
  • Slow and balanced

Common mistakes

  • Gripping loosely so the bell tips over: squeeze the handle hard before the press begins.
  • Pressing too fast: a quick rep loses the balance, so move at a steady pace.

Kettlebell strength swap

Kettlebell Overhead Press

Shoulders

The bell sits behind your wrist, which lets your elbow stay tucked and in front as you press, close to the landmine's start position. It goes fully overhead, so pick it once overhead pressing feels fine.

How to do it

  1. Hold the bell in the rack at your shoulder, resting on the back of your forearm, elbow tucked to your ribs, wrist straight.
  2. Brace your trunk and let your free arm hang by your side.
  3. Press straight up until your arm locks out beside your ear.
  4. Lower under control back to your shoulder. Finish all reps, then switch arms.

Cues

  • Wrist straight, knuckles to the ceiling
  • Ribs down, don't lean back
  • Lock out beside your ear, not in front of it

Common mistakes

  • Bending the wrist back under the bell: grip the handle deep in the palm, not in the fingers.
  • Dipping your legs to start the press: that is a push press. Keep your knees locked and count only strict reps.

Barbell and machines

For heavy two-arm pressing in a gym without a landmine. Both go straighter overhead than the landmine, so use them once that range feels fine.

Supported machine swap

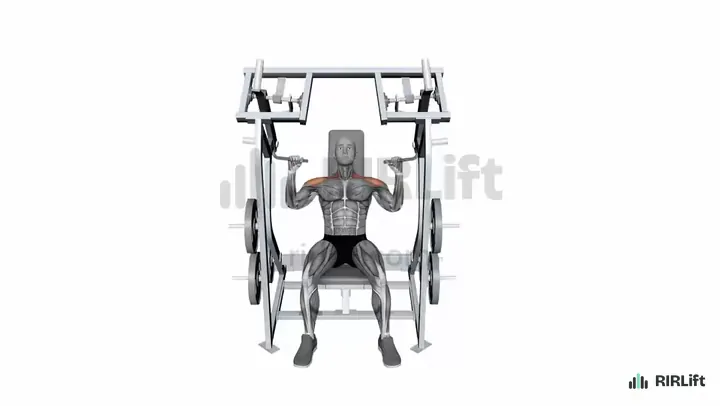
Machine Shoulder Press

Shoulders

The seat and backrest take balance out of the press, so your shoulders and triceps can be pushed close to failure. Use it when you want heavy, simple pressing and there is no landmine in the gym.

How to do it

  1. Set the seat so the handles start at about shoulder height.
  2. Sit with your back flat against the pad, feet planted, and grip the handles.
  3. Press up until your arms are nearly straight overhead.
  4. Lower the handles back to shoulder height under control and press again.

Cues

  • Back stays on the pad
  • Press up, not forward
  • Control the way down

Common mistakes

  • Arching hard off the backrest to finish a rep: lighten the stack and keep your ribs down.
  • Cutting the rep short at the top: finish each press with your arms almost fully straight.
  • Letting the stack rest between reps: stop the handles just above it so your shoulders stay loaded.

Heaviest barbell swap

Barbell Overhead Press

Shoulders

The landmine is often used to build up to this lift. Both arms press a barbell straight overhead, so it loads your shoulders the most, but it also asks the most of your overhead range.

How to do it

  1. Set the bar in a rack at collarbone height and grip it just outside your shoulders, wrists stacked over your elbows.
  2. Unrack it onto your upper chest, take one step back and set your feet about hip width apart.
  3. Squeeze your glutes, brace your abs so your ribs stay down, and take a big breath.
  4. Press straight up, pulling your chin back so the bar clears your face.
  5. Once the bar passes your forehead, push your head through until the bar sits over the middle of your foot with your arms locked.
  6. Lower it along the same line to your upper chest and re-brace before the next rep.

Cues

  • Glutes tight, ribs down
  • Chin back, bar straight up
  • Head through at the top

Common mistakes

  • Leaning back to finish reps, which turns the lift into an incline press: lower the weight until your torso stays vertical for the whole set.
  • Pressing the bar forward around your face: pull your chin back and keep the bar close enough to brush your nose.
  • Stopping short of lockout: finish every rep with the bar over your mid-foot and your arms straight, or the rep doesn't count in your log.

Bands and bodyweight

At home or on the road: raise your feet or your hips to steepen the press, and use a band for one-arm work.

Travel and warm-up swap

Band Overhead Press

Shoulders

Stand on one end of a band and press one arm at a time. The band gets harder as your arm straightens, so it works as a high-rep finisher or a press for days away from the gym.

How to do it

  1. Stand on one end of a handled band with your right foot and hold the handle at your right shoulder.
  2. Brace your stomach and squeeze your glutes.
  3. Press the handle straight up until your arm is nearly straight.
  4. Lower it slowly to your shoulder. Do all reps, then switch.

Cues

  • Ribs down
  • Press straight up
  • Shoulder finishes by your ear

Common mistakes

  • Leaning away from the working arm: brace harder or use a lighter band.
  • Pressing out in front: end with your arm over your shoulder, not your toes.

Best swap with no equipment

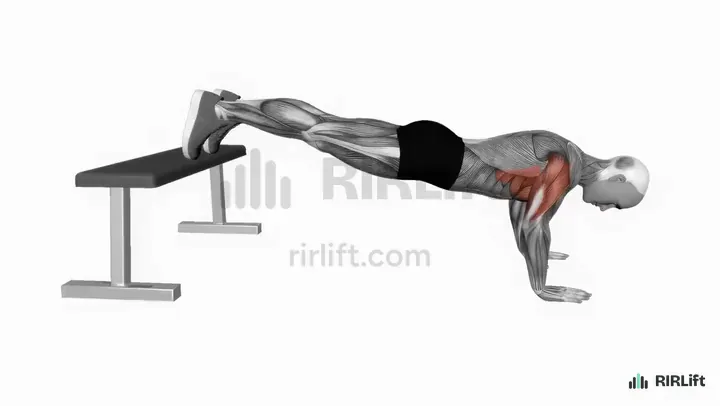
Decline Push-Up

Chest

Raising your feet tips a push-up toward an overhead press, landing close to the landmine's angle with nothing but a chair. Higher feet shift more of the work to your shoulders.

How to do it

  1. Kneel with your back to a bench or a sturdy step, plant your palms a little wider than your shoulders, then set your toes up on it one foot at a time.
  2. Push up until your arms are straight and squeeze your glutes so your heels, hips and shoulders line up like a plank.
  3. Sink your chest toward the gap between your hands, with your elbows angled back about halfway between your ribs and straight out.
  4. Go down until your chest is a fist's height from the floor or your nose would touch first, keeping your hips in line.
  5. Press the floor away until your arms are straight again, and spread your shoulder blades at the top before the next rep.

Cues

  • Glutes tight, body one plank
  • Chest, not chin, leads the way down
  • Push the floor away

Common mistakes

  • Letting your hips sag toward the floor: squeeze your glutes and brace your stomach before every set, and lower the box if the plank keeps breaking.
  • Piking your hips up to make the rep easier: keep your heels, hips and shoulders level; if you can't, your feet are set too high for now.
  • Cutting the rep short a few inches down: lower until your chest is close to the floor, and if your face hits first, put your hands on push-up handles or a pair of dumbbells.

Steepest press with no equipment

Pike Push-Up

Shoulders

Hips high and head toward the floor makes your bodyweight a steep overhead press. Move to it once decline push-ups get easy.

How to do it

  1. Start in a push-up position with your hands a bit wider than your shoulders and fingers spread.
  2. Walk your feet toward your hands and raise your hips until your body forms an upside-down V, with your weight leaning over your hands.
  3. Bend your elbows and lower the top of your head toward a point a few inches in front of your hands, so your head and hands form a triangle.
  4. Bend your elbows out to the sides and stop when your head lightly touches the floor or just above it.
  5. Press the floor away and straighten your arms, pushing your hips back up to the V.

Cues

  • Hips stay high
  • Head forward of hands
  • Push the floor away

Common mistakes

  • Letting the hips drop as you lower: that turns it back into a regular push-up; keep the hips stacked over your shoulders as much as you can.
  • Lowering your head straight between your hands: aim slightly forward so your forearms stay close to vertical.
  • Cutting the range short: lower until your head is near the floor, using a yoga block or book as a target if you need one.

To pair with them

The sessions below add side and rear delt work, because a press alone leaves both short.

Side delts, to pair with the swaps

Dumbbell Lateral Raise

Shoulders

Pressing trains the front of your shoulders; the side delts that make them look wider need a raise. It sits after the press in the gym session below.

How to do it

  1. Pick light dumbbells you can raise for 12 clean reps, and stand with your feet hip width apart, the weights hanging by your thighs.
  2. Lean your chest forward a few degrees, pull your shoulders down away from your ears and soften your elbows.
  3. Sweep the weights out and slightly forward, leading with your elbows, until your upper arms are level with your shoulders.
  4. Hold that top position for a beat, then take two to three seconds to lower until the dumbbells are a hand's width from your thighs.
  5. Start the next rep from there without resting at the bottom or bouncing out of it.

Cues

  • Elbows lead, hands follow
  • Shoulders down, neck long
  • Push the weights out, not up

Common mistakes

  • Shrugging the weight up: if your shoulders rise toward your ears, drop to lighter dumbbells and stop each rep where your upper arm is level.
  • Swinging the torso to start each rep: brace, stand still and keep the first inch of the lift as slow as the rest.
  • Bending the elbows more and more as the set goes on: set the bend on rep one and keep it, or the lever shortens and the set gets easier without you noticing.

Rear delts and upper back, to pair

Face Pull

Shoulders, Upper Back

A pull for the back of your shoulders balances all the pressing in these sessions and keeps your shoulder blades moving well.

How to do it

  1. Set the pulley at or just above head height and attach a rope. Grab it with your thumbs pointing back toward you.
  2. Step back until your arms are straight and the stack lifts, then stagger your feet or sit on a bench so you can lean back slightly without swaying.
  3. Pull the middle of the rope toward your forehead by driving your elbows out and back, keeping them at shoulder height or higher.
  4. As the rope reaches your face, pull the ends apart and rotate your hands back until your fists sit beside your ears, like a double-biceps pose.
  5. Hold that position for a beat, then let your arms straighten under control until your shoulder blades slide forward again.

Cues

  • Elbows high, hands finish behind them
  • Pull the rope apart, not just back
  • Reach forward at the start of every rep

Common mistakes

  • Loading it like a row and leaning back to move the stack: drop the weight until you can hold the end position for a second without your torso rocking.
  • Letting the elbows drop below your shoulders: the pull turns into a row and your lats and biceps take the work. Raise the pulley or lighten the load.
  • Stopping when the rope touches your face: the outward rotation at the end is what the face pull adds, so finish with your fists beside your ears.
Build a session with Face Pull

Rear delts at home, to pair

Band Pull-Apart

Shoulders, Upper Back

The face pull's job with just a light band, which makes it the pulling exercise in the home session.

How to do it

  1. Stand tall and hold a light band with both hands about shoulder-width apart, palms down, arms reaching forward level with your shoulders.
  2. Unlock your elbows slightly, set your shoulders down away from your ears and brace your stomach so your ribs stay in.
  3. Pull your hands out to the sides in a wide arc until the band touches your chest and your arms make a T.
  4. Pinch your shoulder blades toward each other for a moment at the end.
  5. Return your hands to the front slowly, keeping some tension in the band, and start the next rep.

Cues

  • Arms long, hands wide
  • Shoulders down, then apart
  • Slow on the way back

Common mistakes

  • Bending your elbows to finish: keep the same small bend from start to end; if you have to bend more, use a lighter band or a wider grip.
  • Shrugging: think of pulling your shoulder blades down toward your back pockets before you pull apart.
  • Arching your back and pushing your ribs out: brace and keep your ribs stacked over your hips so the pull comes from your shoulders.

Example sessions without the landmine press

Session 1

Gym, but no landmine attachment

Open in the session builder
  • Workouts2× a week
  • Working sets24 a week
  • Per workout~30 min
  • EquipmentDumbbells, Incline Bench, Adjustable Cable

You train in a gym with dumbbells, benches and cables, but there is no landmine and no free corner for a bar.

The steep incline press takes the landmine's angle with both arms, then the single-arm press brings back the one-sided work. Lateral raises and face pulls cover the side and rear delts the presses miss. 12 working sets.

Shoulders
ExerciseSets × repsRIRRest
Incline Dumbbell Press1 warm-up set first 3 × 8–12 2 2 min
Single-Arm Dumbbell Shoulder PressSets are per arm. 3 × 8–12 2 90 s
Dumbbell Lateral Raise 3 × 12–20 1 1 min
Face Pull 3 × 12–15 1 1 min
How to run it
Run it once or twice a week as your shoulder day, at least two days apart.
How to progress
When every set of a press reaches the top of its range at the RIR shown, move to the next dumbbell and start again at the bottom of the range. On the raises and face pulls, add reps first.

Session 2

Home, dumbbells and a band

Open in the session builder
  • Workouts2× a week
  • Working sets24 a week
  • Per workout~25 min
  • EquipmentDumbbells, Resistance Bands

You have a pair of adjustable dumbbells and a light resistance band, and no bench or bar.

Standing alternating presses keep the trunk working the way the landmine does, and decline push-ups add an angled press with your feet on a chair. Band pull-aparts and a one-arm band press finish with high reps. 12 working sets.

Shoulders
ExerciseSets × repsRIRRest
Alternating Dumbbell Shoulder Press1 warm-up set firstReps are per arm. 4 × 10–15 1 75 s
Decline Push-Up 3 × 8–15 1 75 s
Band Pull-Apart 3 × 15–25 1 45 s
Band Overhead PressSets are per arm. 2 × 15–20 1 45 s
How to run it
Twice a week. With light dumbbells, take every set to about one rep short of failure and keep rests short.
How to progress
Add reps until you hit the top of each range on every set, then move up a dumbbell or raise your feet higher on the push-ups.

Session 3

Shoulder pinches on overhead presses

Open in the session builder
  • Workouts2× a week
  • Working sets20 a week
  • Per workout~25 min
  • EquipmentKettlebells, Dumbbells, Adjustable Cable

You picked the landmine press because straight overhead presses bother your shoulder, and now you can't use it.

The bottoms-up press keeps the load light and forces a stacked, slow press. The neutral-grip press lets you work heavier with your elbows forward, in whatever range stays comfortable, and face pulls train the back of the shoulder. 10 working sets.

Shoulders
ExerciseSets × repsRIRRest
Kettlebell Bottoms-Up PressSets are per arm. 3 × 6–10 2 90 s
Neutral-Grip Dumbbell Shoulder Press1 warm-up set first 4 × 10–12 2 90 s
Face Pull 3 × 15–20 1 1 min
How to run it
Once or twice a week. Press only through the range that feels fine and stop a set early if the pinch shows up.
How to progress
Add range before weight: once a full press feels fine for every set, add reps, then the next dumbbell or kettlebell.

Make it fit you

Questions

What can I replace a landmine press with?

A single-arm dumbbell shoulder press is the closest swap, since it keeps the one-arm press and the forward elbow. A steep incline dumbbell press matches the angle with both arms, and a decline push-up does it with no equipment.

Can I do a landmine press with dumbbells?

Not the exact movement, but a single-arm dumbbell press with your elbow slightly forward and your torso still trains the same muscles. Half-kneeling makes it even closer.

Can a landmine press replace an overhead press?

For building your shoulders, yes: it trains the front delts and triceps hard and is easier on stiff shoulders. It doesn't train pressing fully overhead, so if a bigger overhead press is your goal, keep some overhead pressing.

How do you do a landmine press without a landmine?

Put one end of a barbell in a corner, padded with a towel, and load the other end. It moves on the same arc as a landmine attachment.

What are the benefits of the landmine press?

It lets you press hard without reaching fully overhead, trains one side at a time, and makes your trunk resist twisting. Many lifters with touchy shoulders can press on it without pain.

What is a good landmine press alternative at home?

With dumbbells, the alternating dumbbell shoulder press. With nothing, a decline push-up with your feet on a chair, or a pike push-up once that gets easy.