Pike push-up alternatives: easier, harder, and with weights

If pike push-ups are too hard, the best alternative is the decline push-up: start with your feet on a low step and raise them over the weeks until a pike push-up is within reach. If they have gotten easy, move on to handstand push-ups against a wall, building up with handstand holds. If your wrists or hamstrings are the problem, press instead: a band overhead press at home, or a dumbbell shoulder press or landmine press with weights.

What a pike push-up alternative has to replace

The pike push-up trains your front delts and triceps, with your upper chest and upper traps helping. Lifting your hips tips your body toward upside down, so more of your bodyweight presses through your shoulders than in a regular push-up. It is hardest at the bottom, with your head near the floor.

How to do the pike push-up

Easier: build up to the pike push-up

If you can't get a full rep, train the same press with less of your weight on your shoulders, and make it harder a step at a time.

Easiest swap

Push-Up

Chest

A regular push-up still trains your front delts and triceps, with more chest. Use it to build the basic pressing strength a pike push-up needs.

How to do it

  1. Place your hands slightly wider than shoulder width with your fingers pointing ahead, then walk your feet back until your head, hips and heels line up.
  2. Tighten your glutes and pull your ribs down so your hips stay level with your shoulders.
  3. Bend your elbows back at roughly 45 degrees to your body and lower until your chest is about a fist above the floor.
  4. Push the floor away to straight arms and go straight into the next rep.

Cues

  • Body one straight line
  • Elbows at 45 degrees, not flared
  • Chest to the floor, not chin

Common mistakes

  • Letting your hips drop or rise late in the set: once your body stops being one line, end the set there.
  • Stopping well above the floor: bring your chest almost to the ground on every rep, and use the incline push-up if you can't yet.
  • Reaching for the floor with your chin while your chest stays high: lead with your chest and keep your head in line with your body.
Build a session with Push-Up

Best step toward the pike push-up

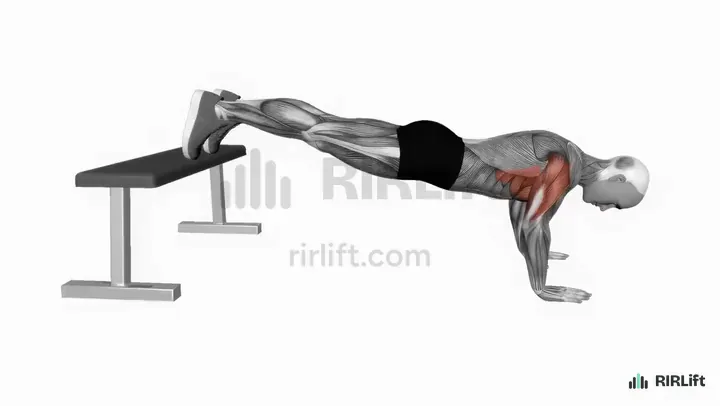
Decline Push-Up

Chest

Feet on a step tilts you toward upside down, putting more of the load on your shoulders. Start low and raise your feet as you get stronger, until the pike push-up feels within reach.

How to do it

  1. Kneel with your back to a bench or a sturdy step, plant your palms a little wider than your shoulders, then set your toes up on it one foot at a time.
  2. Push up until your arms are straight and squeeze your glutes so your heels, hips and shoulders line up like a plank.
  3. Sink your chest toward the gap between your hands, with your elbows angled back about halfway between your ribs and straight out.
  4. Go down until your chest is a fist's height from the floor or your nose would touch first, keeping your hips in line.
  5. Press the floor away until your arms are straight again, and spread your shoulder blades at the top before the next rep.

Cues

  • Glutes tight, body one plank
  • Chest, not chin, leads the way down
  • Push the floor away

Common mistakes

  • Letting your hips sag toward the floor: squeeze your glutes and brace your stomach before every set, and lower the box if the plank keeps breaking.
  • Piking your hips up to make the rep easier: keep your heels, hips and shoulders level; if you can't, your feet are set too high for now.
  • Cutting the rep short a few inches down: lower until your chest is close to the floor, and if your face hits first, put your hands on push-up handles or a pair of dumbbells.

Harder: when pike push-ups get easy

The next step is upside down against a wall. Learn the hold, then the press.

Builds the handstand position

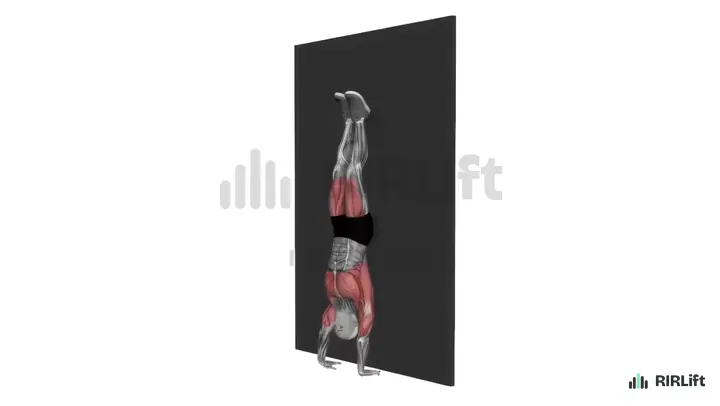
Handstand Hold

Shoulders

Holding a wall handstand teaches you to push tall and stay stacked over your hands, which you need before pressing upside down. Hold for time, not reps.

How to do it

  1. Place your hands about a hand's length from a wall, shoulder width apart.
  2. Kick one leg up, then the other, until your heels rest on the wall.
  3. Push the floor away so your shoulders reach up toward your ears and you are one straight line from hands to heels.
  4. Hold, then step down one leg at a time.

Cues

  • Push the floor away
  • Squeeze glutes
  • Look at the floor between hands

Common mistakes

  • Sinking into your shoulders: push the floor away so your shoulders reach toward your ears.
  • Arching your lower back to stay on the wall: squeeze your glutes and pull your ribs in.

Next step upside down

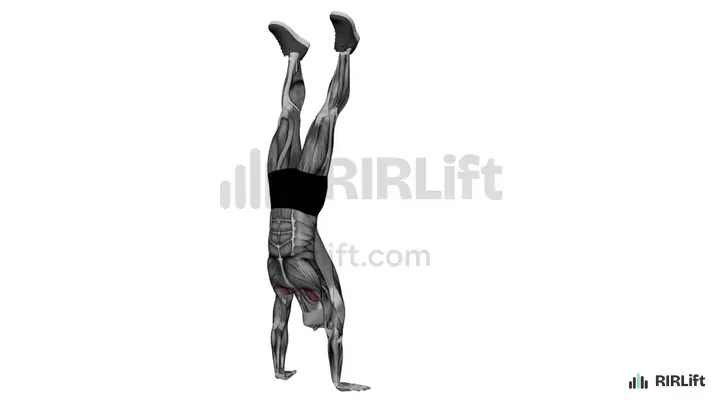
Handstand Push-Up

Shoulders, Triceps

With your heels on a wall, your shoulders lower almost your whole bodyweight. A knee tuck and leg kick helps you press back up, so you can get reps before you can press it strictly. Move to it once you can do about ten clean pike push-ups.

How to do it

  1. Place your hands a hand's length from a wall, a little wider than your shoulders, with a folded towel on the floor between them.
  2. Kick up into a handstand with your heels resting on the wall.
  3. Lower your head slowly until it lightly touches the towel.
  4. At the bottom, tuck your knees down toward your chest, then kick your legs back up the wall and press to straight arms in one drive.
  5. Come down one leg at a time when the set is over.

Cues

  • Slow on the way down
  • Tuck, kick, press
  • Lock out tall

Common mistakes

  • Dropping the last few inches onto your head: stop the set when you can no longer control the lowering.
  • Kicking before your head reaches the towel: lower all the way first, then tuck and drive.

With a band or weights

If your wrists or hamstrings make the pike position uncomfortable, press standing or seated instead.

Swap that spares your wrists

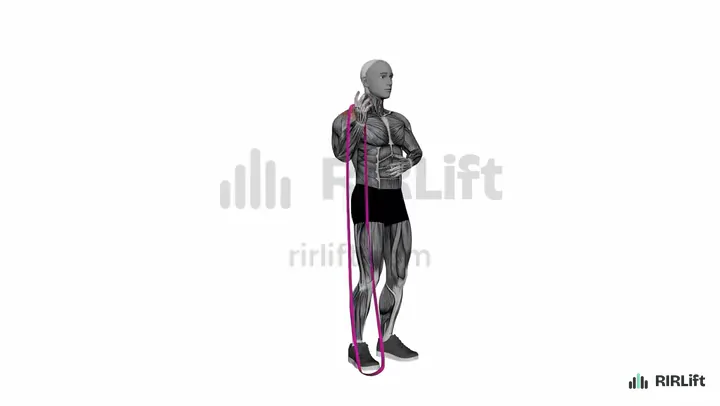
Band Overhead Press

Shoulders

Stand on one end of a band and press one handle overhead. It trains the same shoulders with your wrists straight on a handle instead of bent on the floor.

How to do it

  1. Stand on one end of a handled band with your right foot and hold the handle at your right shoulder.
  2. Brace your stomach and squeeze your glutes.
  3. Press the handle straight up until your arm is nearly straight.
  4. Lower it slowly to your shoulder. Do all reps, then switch.

Cues

  • Ribs down
  • Press straight up
  • Shoulder finishes by your ear

Common mistakes

  • Leaning away from the working arm: brace harder or use a lighter band.
  • Pressing out in front: end with your arm over your shoulder, not your toes.

Dumbbell swap

Alternating Dumbbell Shoulder Press

Shoulders

Standing and pressing one dumbbell at a time trains your shoulders and trunk, and you can add weight in steps, which bodyweight can't do.

How to do it

  1. Stand holding a dumbbell at each shoulder, palms turned in.
  2. Press one dumbbell up to a straight elbow while the other stays put.
  3. Lower it back to the shoulder.
  4. Press the other side and keep switching until both arms have done their reps.

Cues

  • One up, one parked
  • Brace before each press
  • Stay tall

Common mistakes

  • Leaning toward the side that is pressing: the parked dumbbell should help keep you level.
  • Letting the waiting arm drop: hold it at the shoulder the whole set.

Seated dumbbell swap

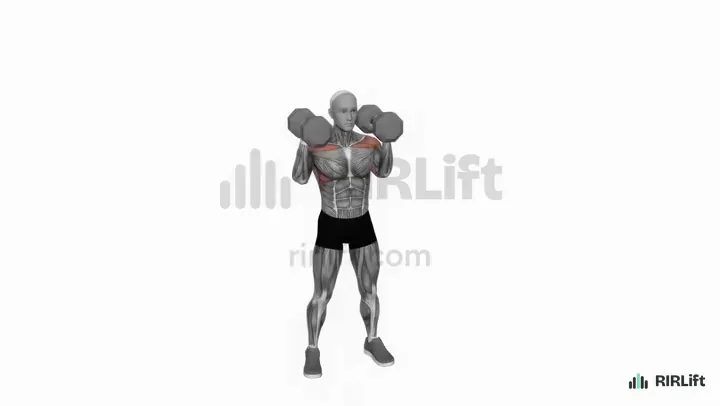
Dumbbell Shoulder Press

Shoulders

With your back against an upright bench, your shoulders and triceps do all the work. Pick it when you want the press heavier than your bodyweight allows.

How to do it

  1. Set a bench upright or one notch back from vertical, sit with your feet flat, and rest a dumbbell on each thigh.
  2. Kick one knee up at a time to bring the dumbbells to shoulder height, then set your back against the pad.
  3. Turn your elbows slightly forward so they sit a little in front of your torso, palms facing forward or angled in.
  4. Drive both weights overhead on a slight inward arc until your elbows are straight, keeping your ribs down and your back on the pad.
  5. Lower slowly until the dumbbells are around ear height or a bit below, then press again.

Cues

  • Ribs down, back on the pad
  • Elbows a little forward
  • Press up and slightly in

Common mistakes

  • Arching your lower back off the pad to finish reps: that turns it into an incline press, so lighten the weight and keep your ribs stacked over your hips.
  • Flaring the elbows straight out at shoulder height: bring them a little forward so the shoulder joint stays comfortable at the bottom.
  • Stopping each rep well above your ears: lower to around ear height so the delts work through a full range.

Kettlebell swap

Kettlebell Overhead Press

Shoulders

The bell sits behind your wrist with your elbow tucked, which suits many shoulders. One arm at a time, standing.

How to do it

  1. Hold the bell in the rack at your shoulder, resting on the back of your forearm, elbow tucked to your ribs, wrist straight.
  2. Brace your trunk and let your free arm hang by your side.
  3. Press straight up until your arm locks out beside your ear.
  4. Lower under control back to your shoulder. Finish all reps, then switch arms.

Cues

  • Wrist straight, knuckles to the ceiling
  • Ribs down, don't lean back
  • Lock out beside your ear, not in front of it

Common mistakes

  • Bending the wrist back under the bell: grip the handle deep in the palm, not in the fingers.
  • Dipping your legs to start the press: that is a push press. Keep your knees locked and count only strict reps.

In the gym

Two supported presses for when you have machines and plates.

Best for a sore shoulder

Landmine Press

Shoulders

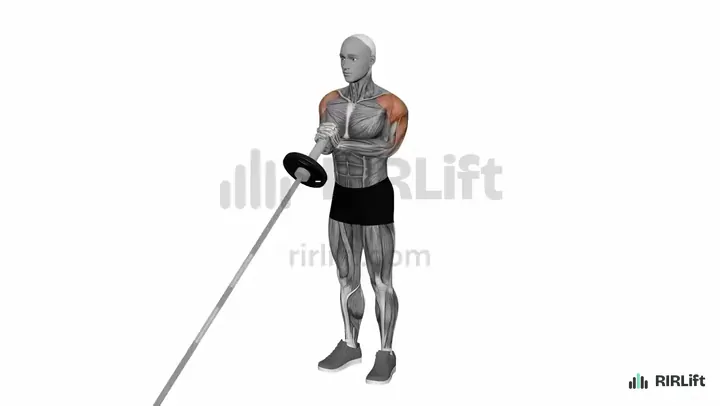
The bar travels up and forward on an arc, so your arm doesn't have to reach overhead. A good gym swap if pike push-ups bother your shoulder.

How to do it

  1. Wedge one end of an empty barbell into a landmine or a corner, and load the free end with plates.
  2. Stand facing the loaded end, feet about shoulder width, and lift the end of the bar to your upper chest.
  3. Wrap both hands around the sleeve end, elbows under the bar and close to your ribs.
  4. Squeeze your glutes and keep your ribs down, then press the bar up and forward along its arc until your arms are straight.
  5. Let your shoulder blades reach forward at the top, then lower under control until the bar is back at your chest.

Cues

  • Both hands on the sleeve
  • Press where the bar wants to go
  • Ribs down, glutes tight

Common mistakes

  • Leaning back to finish the rep: if your chest tips back as the set goes on, take a plate off and keep your ribs stacked over your hips.
  • Pushing straight up against the arc: the bar is fixed at the floor, so aim up and forward and let it travel its own path.
  • Elbows flaring out wide: keep them under the bar so the press stays in line with your shoulders.

Machine swap

Machine Shoulder Press

Shoulders

Seated with your back supported and a fixed path, you can push your shoulders to failure with no balance or wrist strain.

How to do it

  1. Set the seat so the handles start at about shoulder height.
  2. Sit with your back flat against the pad, feet planted, and grip the handles.
  3. Press up until your arms are nearly straight overhead.
  4. Lower the handles back to shoulder height under control and press again.

Cues

  • Back stays on the pad
  • Press up, not forward
  • Control the way down

Common mistakes

  • Arching hard off the backrest to finish a rep: lighten the stack and keep your ribs down.
  • Cutting the rep short at the top: finish each press with your arms almost fully straight.
  • Letting the stack rest between reps: stop the handles just above it so your shoulders stay loaded.

To pair with them

The sessions below add triceps, side delt or rear delt work.

Triceps, to pair

Close-Grip Push-Up

Triceps, Chest

Hands under your shoulders and elbows tucked shifts a push-up to your triceps. It follows the presses in the beginner session.

How to do it

  1. Get into a high plank with your hands directly below your shoulders.
  2. Lower yourself with your elbows sliding back past your ribs.
  3. Stop just above the floor, then push up to locked elbows.
  4. Drop to your knees for the last reps if your hips start to sag.

Cues

  • Hands under shoulders
  • Elbows travel back
  • Full lockout

Common mistakes

  • Flaring the elbows into a T: that moves the work to your chest.
  • Half reps near the top: lower until your chest is close to the floor.

Rear delts, to pair

Band Pull-Apart

Shoulders, Upper Back

Balances the pressing with the back of your shoulders in the bodyweight sessions.

How to do it

  1. Stand tall and hold a light band with both hands about shoulder-width apart, palms down, arms reaching forward level with your shoulders.
  2. Unlock your elbows slightly, set your shoulders down away from your ears and brace your stomach so your ribs stay in.
  3. Pull your hands out to the sides in a wide arc until the band touches your chest and your arms make a T.
  4. Pinch your shoulder blades toward each other for a moment at the end.
  5. Return your hands to the front slowly, keeping some tension in the band, and start the next rep.

Cues

  • Arms long, hands wide
  • Shoulders down, then apart
  • Slow on the way back

Common mistakes

  • Bending your elbows to finish: keep the same small bend from start to end; if you have to bend more, use a lighter band or a wider grip.
  • Shrugging: think of pulling your shoulder blades down toward your back pockets before you pull apart.
  • Arching your back and pushing your ribs out: brace and keep your ribs stacked over your hips so the pull comes from your shoulders.

Side delts, to pair

Dumbbell Lateral Raise

Shoulders

Presses barely train your side delts, so the gym session adds a raise.

How to do it

  1. Pick light dumbbells you can raise for 12 clean reps, and stand with your feet hip width apart, the weights hanging by your thighs.
  2. Lean your chest forward a few degrees, pull your shoulders down away from your ears and soften your elbows.
  3. Sweep the weights out and slightly forward, leading with your elbows, until your upper arms are level with your shoulders.
  4. Hold that top position for a beat, then take two to three seconds to lower until the dumbbells are a hand's width from your thighs.
  5. Start the next rep from there without resting at the bottom or bouncing out of it.

Cues

  • Elbows lead, hands follow
  • Shoulders down, neck long
  • Push the weights out, not up

Common mistakes

  • Shrugging the weight up: if your shoulders rise toward your ears, drop to lighter dumbbells and stop each rep where your upper arm is level.
  • Swinging the torso to start each rep: brace, stand still and keep the first inch of the lift as slow as the rest.
  • Bending the elbows more and more as the set goes on: set the bend on rep one and keep it, or the lever shortens and the set gets easier without you noticing.

Example sessions without the pike push-up

Session 1

Can't do a pike push-up yet

Open in the session builder
  • Workouts3× a week
  • Working sets30 a week
  • Per workout~20 min
  • EquipmentBodyweight

You train at home with no equipment and can't yet lower to the floor and press back up in a pike.

Decline push-ups with your feet on a low step take the pike push-up's place, regular push-ups add more pressing, and close-grip push-ups finish your triceps. Raise the step as you get stronger. 10 working sets.

Push
ExerciseSets × repsRIRRest
Decline Push-Up 4 × 6–12 2 90 s
Push-Up 3 × 8–15 1 75 s
Close-Grip Push-Up 3 × 6–12 1 75 s
How to run it
Two or three times a week on non-consecutive days. Try one set of pike push-ups at the start of each session to see how close you are.
How to progress
When every decline set reaches 12 reps, raise your feet a few inches. Once you can do five decline push-ups with your feet at hip height, start replacing the first set with pike push-ups.

Session 2

Pike push-ups got easy

Open in the session builder
  • Workouts2× a week
  • Working sets22 a week
  • Per workout~25 min
  • EquipmentResistance Bands

You can do 15 or more clean pike push-ups and want something harder with no equipment.

Wall handstand push-ups take over as the main press for low reps. Decline push-ups with your feet high add more volume, and band pull-aparts balance the back of your shoulders. 11 working sets.

Push
ExerciseSets × repsRIRRest
Handstand Push-UpHeels on the wall. 5 × 3–6 1 2:30 min
Decline Push-UpFeet as high as you can. 3 × 12–20 1 75 s
Band Pull-Apart 3 × 15–25 1 45 s
How to run it
Twice a week. If you can't do three handstand push-ups yet, do the lowering part slowly and kick back up.
How to progress
Add one rep per set before adding sets. When you get eight handstand push-ups on every set, put your hands on two stable books to lower deeper.

Session 3

Gym, wrists or shoulder sore

Open in the session builder
  • Workouts2× a week
  • Working sets24 a week
  • Per workout~25 min
  • EquipmentLandmine, Shoulder Press, Dumbbells, Resistance Bands

You train in a gym and the pike position bothers your wrists or the top of your shoulder.

The landmine press loads your shoulders hard with your hands on a bar and your arm in front of you, the machine press adds supported volume, lateral raises train the side delts, and band pull-aparts the back of your shoulders. 12 working sets.

Shoulders
ExerciseSets × repsRIRRest
Landmine Press1 warm-up set first 3 × 8–12 2 90 s
Machine Shoulder Press 3 × 10–12 1 90 s
Dumbbell Lateral Raise 3 × 12–20 1 1 min
Band Pull-Apart 3 × 15–20 1 45 s
How to run it
Once or twice a week, at least two days apart.
How to progress
Add reps until every set reaches the top of its range, then add the smallest weight jump.

Make it fit you

Questions

What is an easier version of the pike push-up?

The decline push-up with your feet on a low step. Raise your feet over time and it gets closer and closer to a pike push-up.

What comes after pike push-ups?

Pike push-ups with your feet on a box, then wall handstand push-ups. Build up with wall handstand holds so you can stay stacked upside down.

What are some alternatives to handstand push-ups?

Pike push-ups and decline push-ups with your feet high are the bodyweight options. With equipment, a dumbbell or barbell shoulder press trains the same muscles.

Are pike push-ups actually effective?

Yes. They load your front delts and triceps heavily with no equipment, and you can keep them hard by raising your feet or moving to handstand push-ups.

Do pike push-ups work your back?

Not much. They mainly train your shoulders and triceps, with your upper traps helping. Pair them with a pull such as band pull-aparts for your back.

What is a good pike push-up alternative at home?

A decline push-up if you have no equipment, or a band overhead press or dumbbell shoulder press if you have a band or dumbbells.